It happens to everyone to shoot in areas frequented by many people, for example the main attractions of a city. This is the case when tourists ruins our photo idea or simply when you don’t notice that element that you would avoid in the final image. I live in Rome and tourists are really a nightmare for this kind of things, so over the years I learned to juggle well in these situations.
While for people and moving objects the removal from he photo can be relatively simple, by taking multiple exposures and deleting them manually or automatically, the static element instead creates a huge problem for its elimination. So Let’s see how to remove people or object from a a single shot, focusing more attention on the harder single shot removal.
MULTIPLE EXPOSURES
In presence of multiple exposures the fastest way to remove unwanted items is to use the “Median” function in Photoshop.
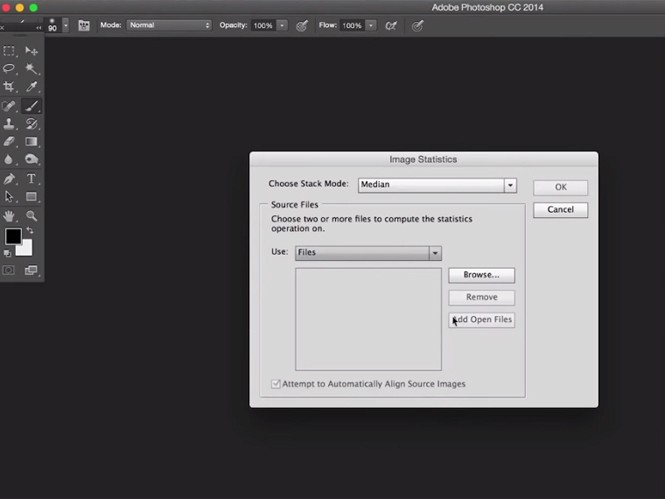
– You should to go to File > Scripts > Statistics.
– Select “Median” for the stack mode and check “Attempt to Automatically Align Source Images.”
– Select your set of images and click ok.
Photoshop will process the images to preserve the static background removing everything that changes between the shots (moving people, cars, birds etc). If the final result is not perfectly clean you can continue to refine the scene using clone stamp tool.
SINGLE EXPOSURE
In the presence of static elements instead as I said the work is more difficult. In this case the undesiderable element will always be in its place without the change to erase them using another exposure.
This is the case of my photo in Oia Santorini where hundreds of people present to photograph the sunset did not allow me to be able to move easily and choose a better point of shot. I wanted to avoid the shot using 35mm because would have lost too much in terms of scenery, so I made the shot in 24mm while knowing the hard work that expect to me, especially for the antenna on huge right. 🙂

To start remove elements from a single exposure:
– Select what you want to delete, for example using magnetic lasso, magic wand or quick selection tool.
– Then select Edit>Fill and make the choice like this, then click ok
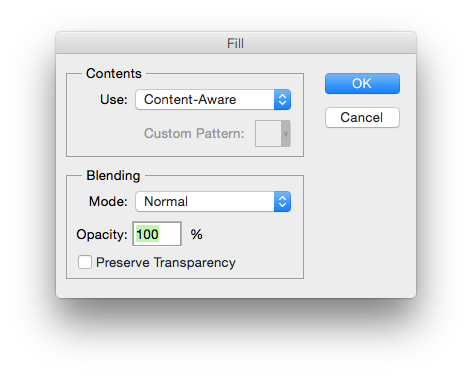
The selection you made will be absorbed by the content of the picture, using the elements of background and nearby the selection you made. Obviously small selections you make greater is the change to be more accurate. So you should do it portion for portion on wich you want to delete to create a more realistic effect of disappearance, like this.

At the end of the erasing may be still something to delete, in this case you can use the clone stamp tool. The clone stamp for correct and clean use must be used with inverse selection (as shown in the picture of this wall with the people above that I should not touch).

Select the part you want to “save” that you do not want to affect from the clone Stamp tool
Right mouse button and click on Select Inverse
Then you can clone whatever you want without the risk of damaging the wall

This technique will help you a lot to take pictures with a little more freedom even in the presence of so many people, but try to make your life easier shooting when you have more free field 🙂
This is the finished work, I chose to delete only people and things than most impacted in the picture but with patience it is possible to remove all.


