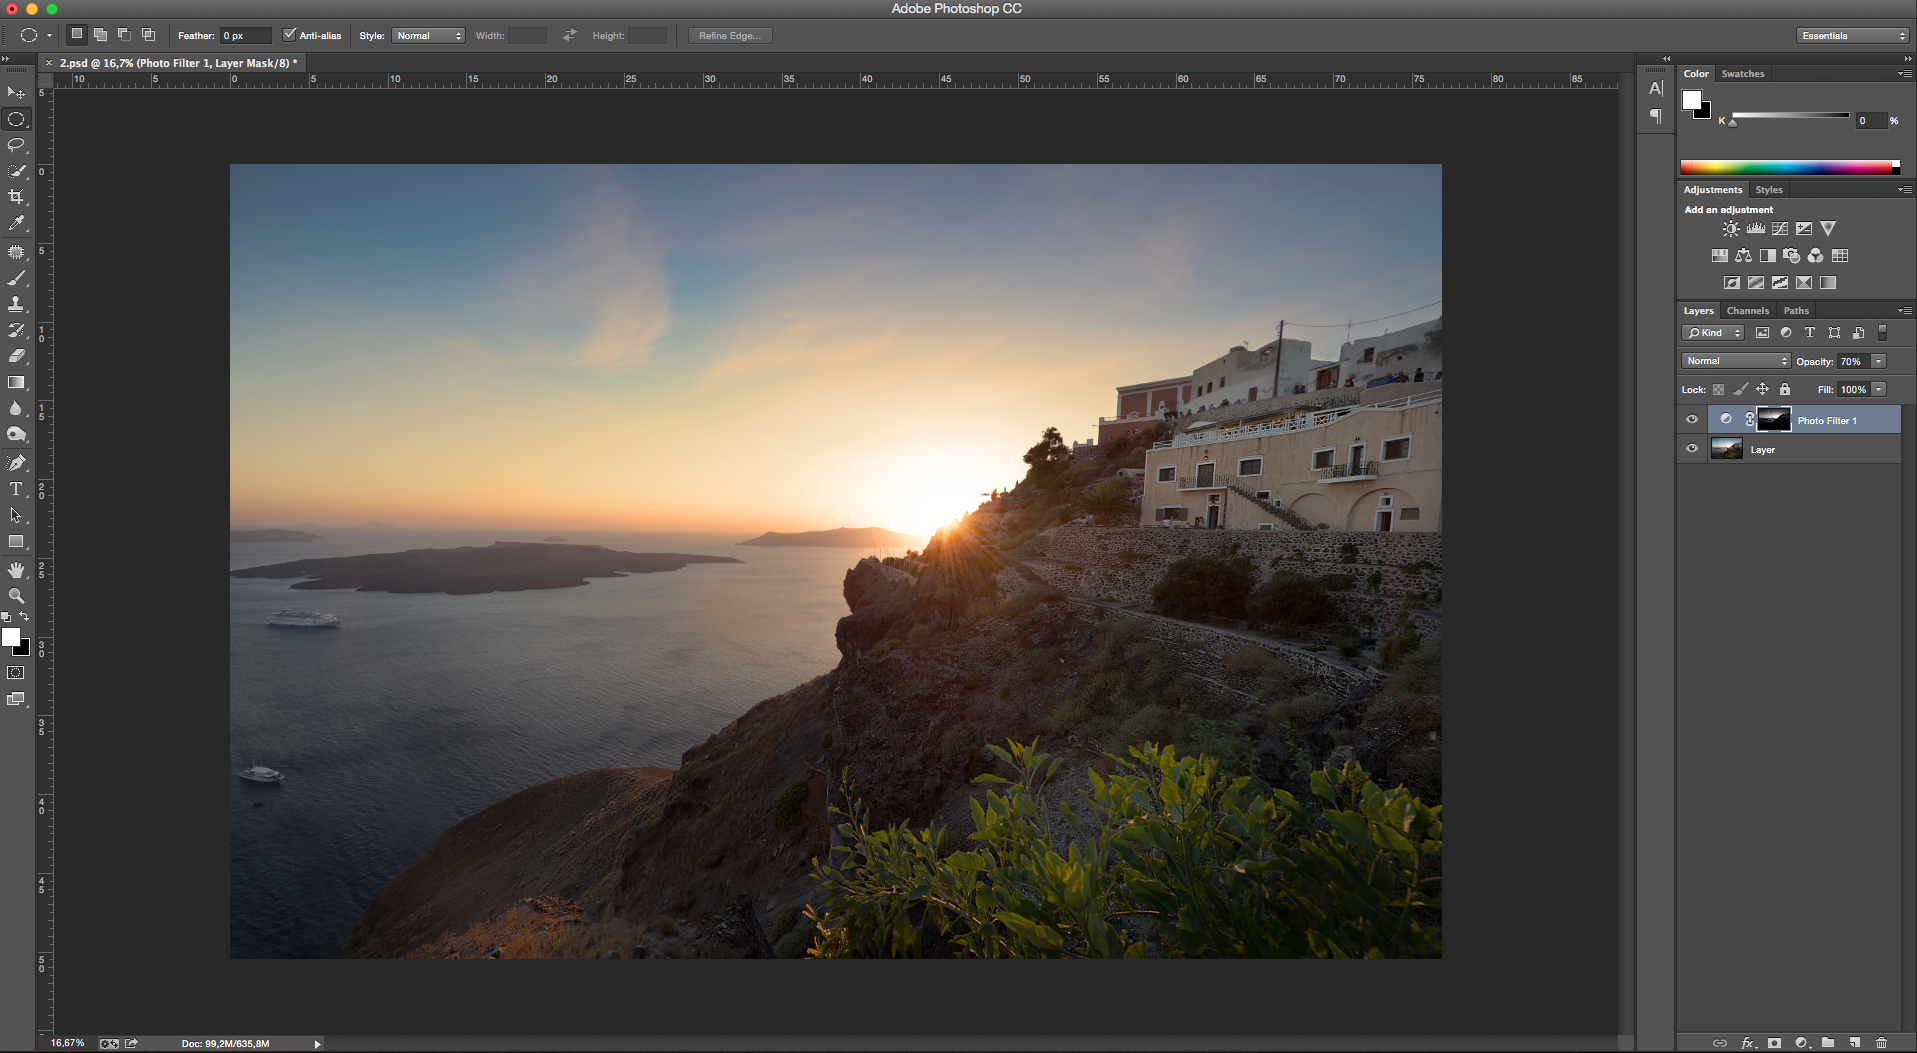
Taking shots during sunset it means to take them during the golden hour. All the best images whether at sunset dawn share the beauty and the advantage of the warm light intense that only the golden hour can offer
Personally I shoot in RAW, which as you know does not shine in the tackle, so every time I come to edit a photo of beautiful sunsets are always looking for something that can make it sharper and more visual impact.
Hence I decided to create this little guide that contains all my main interventions to make a impressive sunset:
FIRST METHOD USING CURVES
1- Select Curves and switch to Red Channel
2- move the curve upward to intensify red colours
3- switch to Blue Channel
4- move the curve downward to intensify yellow colours
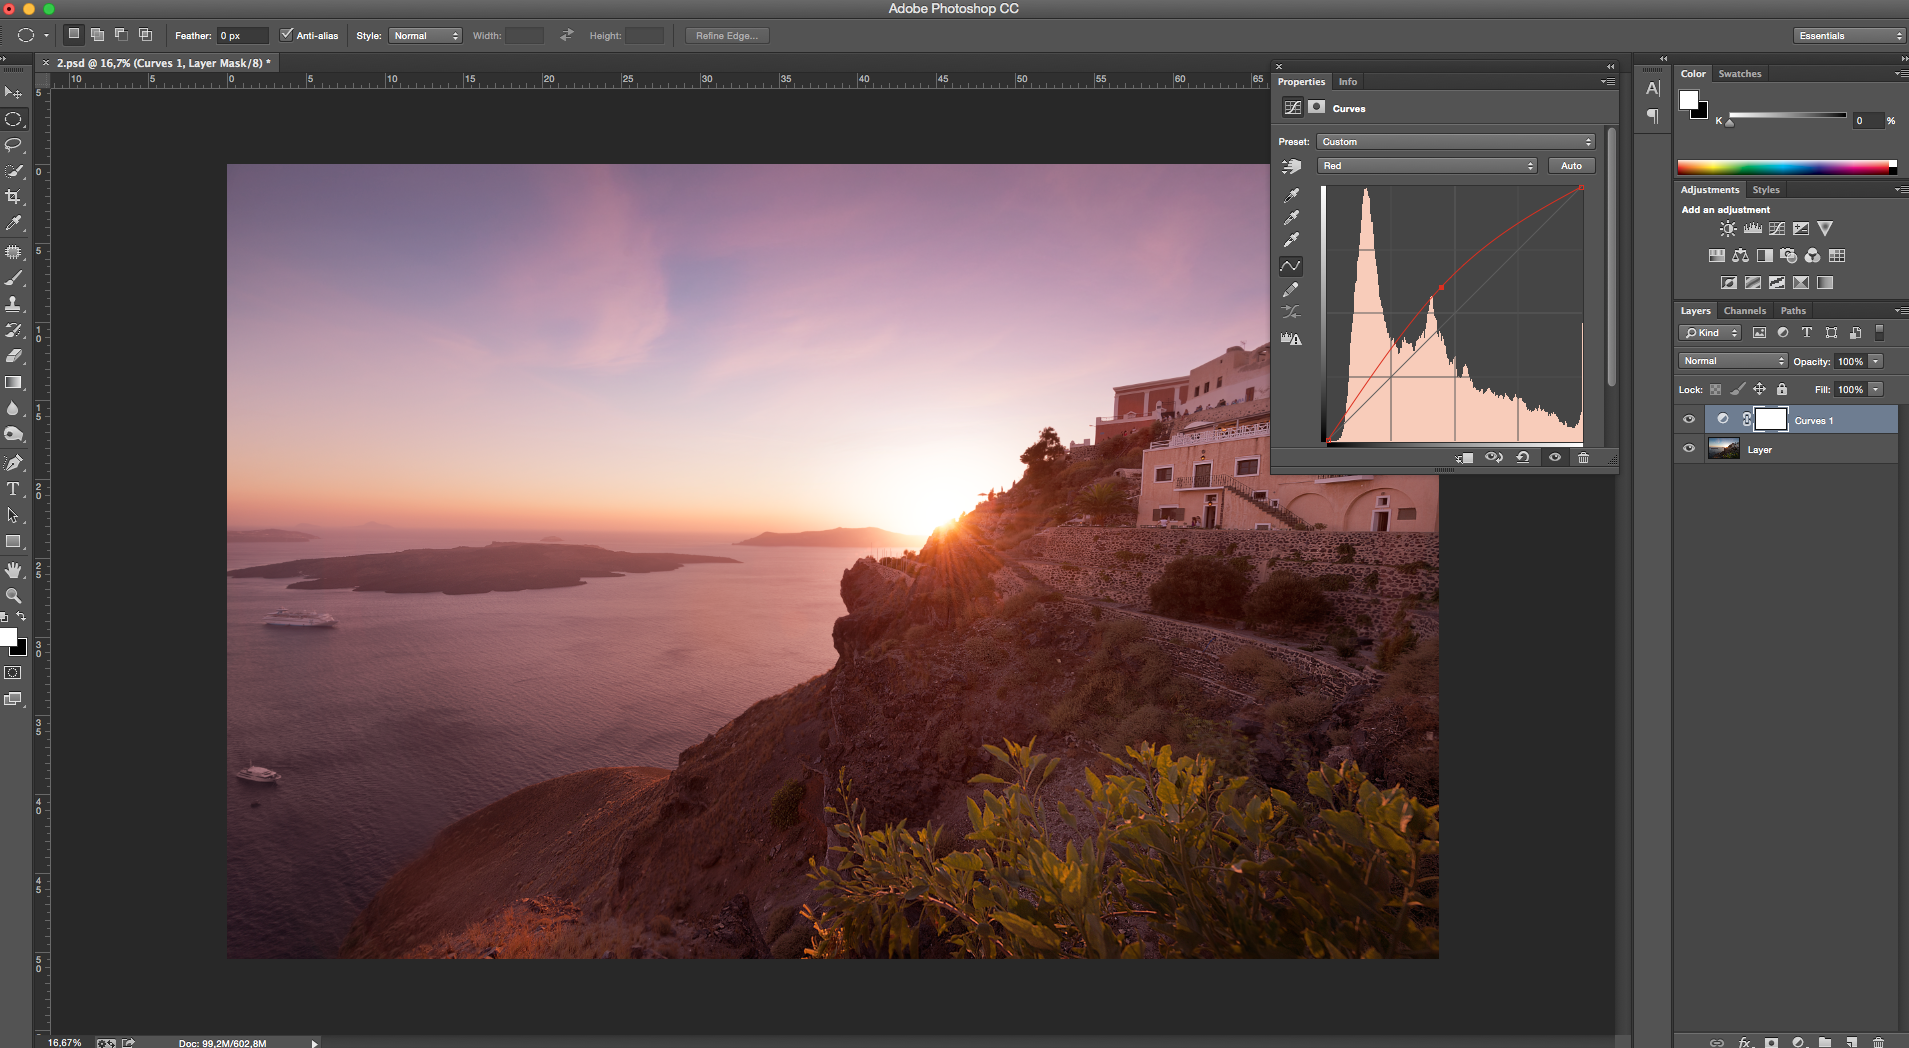

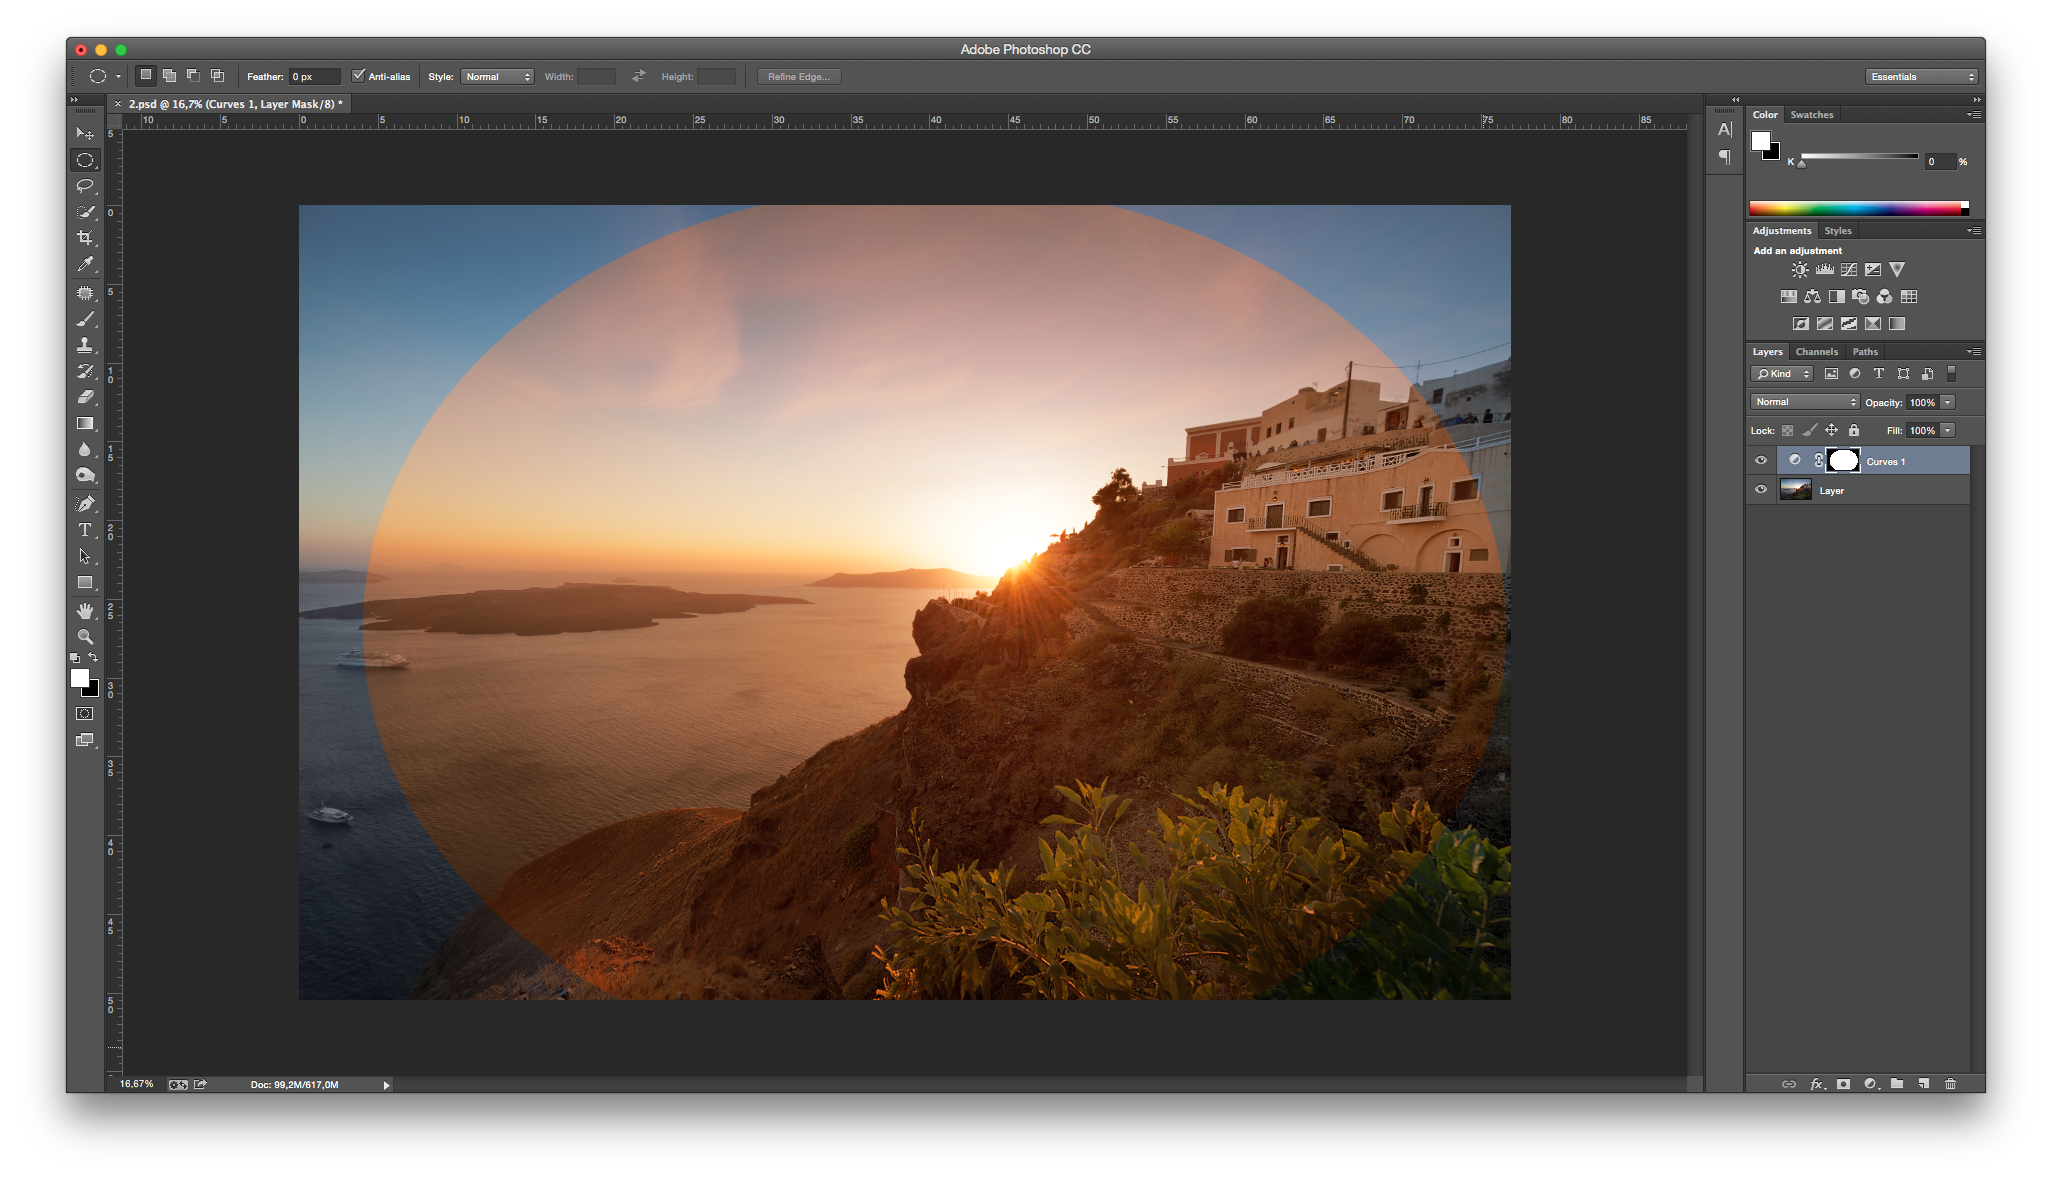
Now click on “Elliptical Marque Tool” and draw a circle inside the image, this will be the area, this will be the area affected by the intervention of the yellow enhance effect
– Invert the selection Ctrl + I (or Cmd+I on Mac)
– Deselect Ctrl+D (or Cmd +I on Mac)
– and invert again
Now the image should result like this:
Go to > Filters > Blur >Gaussian Blur and select an high value of blur.
Now the effect will be applied in a diffuse way on the whole image, decrease opacity until the point that you like
This is the final result

SECOND METHOD USING PHOTO FILTERS
1- Go to Photo Filter and select a warming filter (numer 81 or 85)
2- Pull it until 100

3- Select > Image >Apply image and take care that the settings are as follows:

Repeat the last passage (3) until you are happy, decrease opacity if if you prefer a more soft effect
This is the final result